Key Takeaways
- Flashing directs incidental water outward instead of allowing it to enter the wall assembly.
- Exterior caulk is important, but it cannot replace correctly layered flashing.
- Existing moisture damage, deteriorated sills, and wall finishes can change the installation plan.
- A properly sealed window still needs intentional drainage paths.
- Final inspection should include the window operation, exterior transitions, and signs of trapped water.
For Longboat Key, FL replacement windows and doors, proper flashing matters as much as the window itself. Wind-driven rain can push against the perimeter of even an impact-rated window, testing every transition between the frame, wall, exterior finish, and drainage plane.
Flashing is the layered water-management material around an opening. Its job is not to make water disappear. Its job is to catch water that gets past the exterior surface and guide it back out before it reaches framing, insulation, or interior finishes.
Why Wind-Driven Rain Finds Weak Points Around Florida Windows
A window can be strong, energy efficient, and impact rated, yet still perform poorly if the opening around it does not shed water correctly. Rain under wind pressure does not behave like a gentle downward flow. It can be driven sideways, forced into small gaps, and held against joints much longer than ordinary rain.
That is why the installation must work as a system. The window frame, sill preparation, flashing, weather-resistive layers, exterior cladding, and sealant joints all have separate roles. When those layers overlap in the right order, water has a route outward. When they are reversed, interrupted, or sealed shut in the wrong place, moisture can become trapped.
The trouble often starts quietly. A stain near a sill, swollen trim, soft drywall, peeling finish, a musty smell, or recurring caulk failure can point to a water-management issue. Waiting can allow concealed dampness to affect the wall opening itself, making a future replacement more involved than it would have been when the first signs appeared.
Step 1: Start with the Existing Opening, Wall Conditions, and Water Path
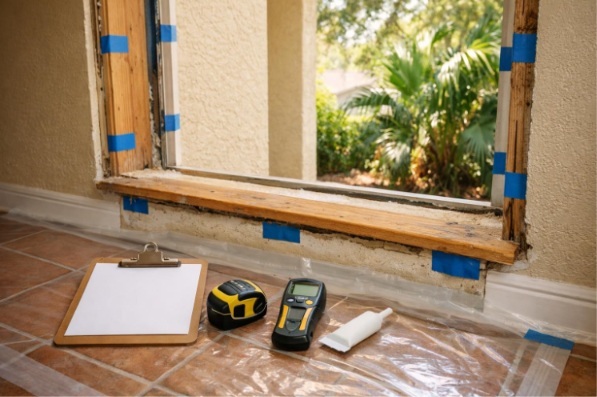
Before a replacement window is selected for the opening, the existing conditions need a close look. The goal is to understand where water may be entering and where it is supposed to drain.
- Review the existing unit and surrounding finish. Look for visible gaps, cracked sealant, damaged trim, staining, loose exterior material, or signs that prior work relied mainly on surface caulk.
- Assess the sill and rough opening. The sill is the bottom of the framed opening. It needs to remain sound and able to support the new unit without creating a low spot where water can sit.
- Trace the outward drainage path. Water should move from upper layers to lower layers and ultimately toward the exterior. A path that sends water behind a wall finish, rather than over it, is a problem even if the window looks well caulked.
- Plan for what is hidden. Old openings can contain concealed deterioration or wall conditions that do not become visible until removal begins. Those findings may affect the flashing approach and sequence.
This is where homeowners often get stuck. They may focus only on glass type or frame style, while the existing wall opening deserves just as much attention. During an in-home evaluation, ask the installer how the sill, side transitions, and head of the opening will manage incidental water.
Step 2: Remove the Old Unit Without Damaging the Water-Management Layers
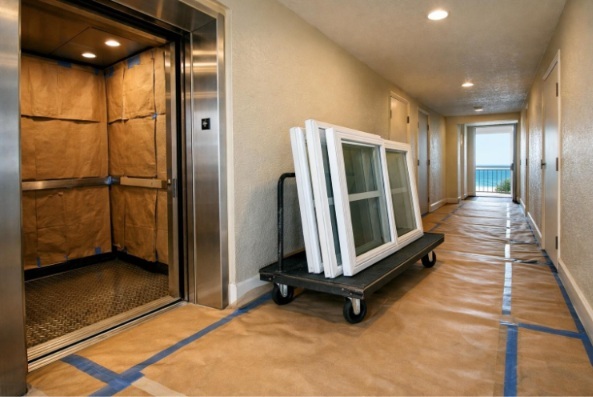
Removal is not simply a matter of taking out an old frame and putting in a new one. The work needs to preserve or carefully expose the materials that control water behind the exterior finish.
Once the old unit is out, the rough opening can be inspected for deteriorated wood, damp materials, gaps, failed sealant, and evidence that water has been running behind the frame. A sealant-only installation may look tidy at the exterior edge while lacking the layered protection needed behind it.
If damaged material or incompatible conditions are found, they should be addressed before the new window is installed. Covering over a compromised sill or leaving a pathway that directs water inward risks repeating the same failure behind a newer, stronger product.
For homeowners evaluating a provider, a useful question is: “What happens if the opening reveals water damage or a missing drainage layer?” A clear answer should explain how the condition will be assessed and how the installation details may need to change.
Step 3: Prepare the Sill and Opening So Incidental Water Has a Way Out
The sill is the first place to think about drainage because water naturally collects at the bottom of the opening. Proper preparation helps prevent that water from reaching the interior side of the wall.
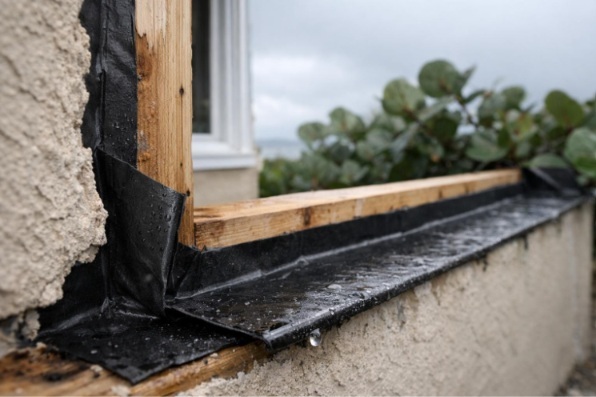
- Create a continuous sill water barrier. Compatible flashing material is applied so it protects the bottom of the opening and turns up at the sides where needed.
- Keep the drainage direction outward. The flashing should direct water toward the exterior, not form a pocket behind the window or wall finish.
- Use shingle-style layering. Each higher layer overlaps the layer below it, much like roof shingles. This allows gravity to carry water down and out instead of behind a lower layer.
- Follow product and wall-specific details. A window manufacturer’s instructions matter, but so do the wall type and exterior finish. One opening may require a different transition detail than another.
This is a small area with a big effect. If the lower flashing is discontinuous, folded incorrectly, or blocked, incidental water can remain in the opening. Over time, that can contribute to staining, material deterioration, and interior moisture symptoms that seem unrelated to the window.
Step 4: Integrate Flashing with the Window, Wall, and Exterior Finish
After the sill is prepared, the window is set and the rest of the flashing sequence ties the frame into the wall’s water-shedding layers. The side and head details must work with the sill detail, not compete with it.
Side flashing helps direct water down toward the sill. Head flashing, sometimes called drip flashing depending on the application, helps keep water from being directed behind the top of the window. The weather-resistive material above the opening needs to overlap the head flashing so water traveling down the wall is carried outward.
The exact materials and sequence vary. Stucco, siding, trim configurations, wall construction, manufacturer instructions, and the shape of the opening all affect the detail. A one-size-fits-all approach is risky because a detail that works at one window can trap water at another.
This is also why exterior appearance alone is not enough to judge installation quality. A narrow, neat bead of sealant may be appropriate at a visible joint, but the more important water control occurs in the layers behind that joint.
For a broader look at product protection during extended absences, read how impact windows protect florida homes when youre away for the season.
Step 5: Seal the Perimeter Without Blocking Drainage
Air sealing and water shedding are related, but they are not the same task. Air sealing limits unwanted air movement around the frame. Water shedding provides a route for moisture to leave the assembly. Both matter, and one should not interfere with the other.
Indiscriminate caulking can create a problem when it closes a designed drainage path or bridges materials that need to move differently. Sealant must also be compatible with the window frame, flashing materials, and exterior finish. A product that fails to bond or becomes brittle can leave gaps where wind-driven rain concentrates.
The practical goal is simple: keep water out at the exterior surface where possible, manage any incidental water that gets past it, and do not trap that water behind the finish. More caulk is not automatically better.
Step 6: Inspect the Finished Installation and Know What to Monitor
A finished installation should be checked for proper fit, smooth operation, secure exterior transitions, and obvious gaps around the frame. The window should open, close, latch, and lock as intended without binding. Exterior finish details should look complete without covering up drainage features that are meant to remain open.
After installation, monitor the areas around windows after heavy rain. Interior staining, recurring moisture at trim, bubbling paint, persistent damp odors, visible separation at exterior joints, or water marks at the sill deserve professional assessment. Addressing those signals early can help limit damage inside the wall.
Clearview Windows & Doors Inc has served Sarasota and Manatee County homes since 1990 with hurricane-resistant window and door options selected for coastal performance. When you are considering Longboat Key, FL replacement windows and doors, ask about the full installation approach, not just the product. For a free in-home, no-obligation quote, call Clearview Windows & Doors Inc at (941) 746-9848.
Frequently Asked Questions
Is Exterior Caulk Enough to Stop Rain Around a Window?
No. Exterior caulk can help seal exposed joints, but it is only one part of the system. Flashing and properly overlapped water-management layers provide a secondary path that moves incidental water back outside.
What Does Flashing Do Around a Replacement Window?
Flashing directs water away from the rough opening and toward the exterior. It helps protect the materials behind the wall finish when wind-driven rain gets past an outer joint or cladding transition.
Why Does Wind-Driven Rain Cause More Trouble Than Normal Rain?
Wind pressure can push rain sideways and into small openings around the frame, trim, and wall finish. That makes layered flashing especially important because water may enter areas that stay dry during a light, straight-down rain.
What Signs Suggest a Window Water-Management Problem?
Watch for stains near the window, soft or swollen trim, peeling paint, damp drywall, visible gaps, recurring sealant failure, or musty odors. These signs do not identify the exact cause by themselves, but they warrant a closer evaluation.
Can Existing Wall Conditions Affect Window Installation?
Yes. Deteriorated sill material, hidden moisture damage, old sealant-only methods, and incompatible exterior finishes can change how the opening needs to be prepared. The condition of the wall should guide the flashing plan before the new window is set.